 STEPP works to make "excellent education accessible to all South Africans". To this end we are involved in multiple long and short term partnerships. Our areas of specific focus are Maths, English Literacy, Science, Early Childhood Development and Making Libraries Happen.
This year we have embarked on the Maths Partnership with a renewed vigour as a result of information gained from our years of experience. The new methodology has meant we have had to rely heavily on the trust of the community and the willingness of the teachers to be vulnerable and deeply honest, to succeed. It has been incredibly rewarding to witness the bravery and commitment of the teachers who have responded to this new regime. As a result, the Maths classroom practise at Insika High School is transforming daily. This year the teachers and pupils committed to a full three week Maths Winter School in July of this year. That meant no holiday. In that time, together we were able to:
- address the gaps that existed in the learners' knowledge of the Core Maths syllabus from Grade 10 through to Grade 12
- reform the learning habits of learners who did not practise Maths
- or engage in the understanding of it
- build up the teacher trainer skills that hold learners accountable for their learning
- and assessed the learners robustly
One learner ended the winter school with a pass mark of 84%. Not all of the news is rosy and some learners have a way to go to achieve their potential, but now it is possible for them to do well. The training continues on a weekly basis with the school and there is a marked difference to the beginning of the year's classroom practices.
During the year we have worked on challenges that the school faces to be able to provide an excellent education to their learners. The school has had to purchase extra books to ensure that each child can work on their own, STEPP and the school have provided calculators for those children who do not have one and the STEPP consultant meets with staff weekly to ensure the teacher training grows from strength to strength.
 The school is particularly challenged with regards to electricity and a library. A quote for their electrical work came to R38 000.00 and this was to ensure just basic electrical access and safety. They do not have a library at present, but one of the staff members has been using broken desks, remodelling them into shelving and slowly making shelves in a back room to create a library.
While electricity and libraries seem unconnected to Maths and learning they are not. If children are exposed to reading and the ritual of scouring books for information their learning in all subjects significantly improves. One of the main obstacles to Maths and Science in South Africa is the fact that many learners are writing their exams and answering questions in their second language. Those learners need to understand English and be able to read it with understanding so that learning and teaching can take place effectively.
Electricity allows for excellent teaching practise. Without access to basic electricity teachers are not able to photocopy notes, create a warm and inviting learning environment and make use of up to date equipment such as laptops, overhead projectors and maybe one day, even smartboards.
The Core Maths classroom is pictured above. You can see the one electrical cable in the eaves that runs through the ceiling from room to room for plug points in the classroom. Students sit near the windows for light.
 In partnership with STEPP we are starting to plan for the library under the banner of the "Making Libraries Happen" partnership. The first step is for the Insika School community to sift through the old books that the school has and to recycle them at Wildlands Trust. The paper that is recycled should generate money for the school. St Anne's College Environment Club is looking to set up a recycling station at the school to encourage environmental awareness and to support the recycling initiative.
STEPP has sourced mobile shelving for a library and would like to buy three of them for the school. The shelving costs between R4295 and R3170 depending on the ones that are purchased. View these mobile shelves on the left.
Mr Sipho Nkabinde with the shelves he has made from broken desks
The R10 000.00 Hilton Covered donation from the 3rd edition, could be spent on buying shelving and supporting the school in setting up their library to encourage English Literacy if STEPP is the elected beneficiary.
Update supplied by STEPP.
 BNI (Business Network International) is a business and professional networking organization whose primary purpose is to exchange qualified business referrals. It is the largest networking organization of its kind. Currently, BNI has over 6600 chapters internationally, and 100 in South Africa, of which 30 are in KZN.
 Congratulations to Chelsea Kilian, in Grade 5 at
  Hilton Ratepayers Association
 Helping people live happier, healthier lives by realizing their genetic potential.
 Our Headmaster, Peter Ducasse, accepted the ALS Ice-bucket Challenge from his Head of School, Tom Webber and Deputy Head of School, Jono Smithers.
 This is one of the MAIN fundraisers for Hilton Pre-Primary, and after the recent water disaster, and all the extra repairs and renovations that are now being needed, we are relying on this being a bumper Food and Wine Fair this year, with a lot of ticket sales.
 Members and other bowling friends are advised that we will be closing our green for its annual spring treatment on 30th September. There are many other tasks we wish to attend to during the closure, including painting the inside of the club house and felling a few trees. If you are able to lend a hand please speak to one of the committee members.
 Cape Town - Minister of Home Affairs Malusi Gigaba has announced changes to the implementation of South Africa's new immigration rules.
 The IF Sponsored Trips played on Friday was won by Jean and John Pluke with their regular lead, John Bayley. Runners-up were Thelma and Mike Mylne and Bill McQuade. We are grateful to the team at Investment Facilitators for their support. On Saturday we played for chickens donated by Quarry SuperSpar. A coin was tossed to decide the winners following a dead tie. Victors through their skill and a bit of luck were Tom Hartley, Tony Francis and Rina Tainton.
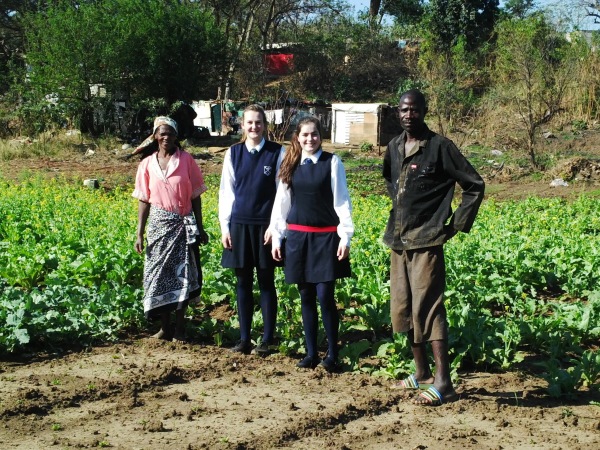 Funds raised during a recent
 We call on you to join the Pietermaritzburg's People's Climate March, part of the largest climate mobilization in history, where we'll be calling for a clean energy future for our City and Province, our people, our planet.
 Seven
Seven  We are now one month into our Community Security Initiative and would like to provide you with feedback on how the project is going and once again give you an opportunity to communicate any comments or questions to the project team. Please see the comments and feedback section below.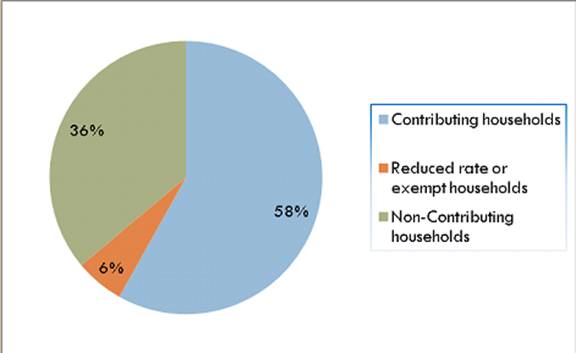
 Our boundaries are from the Knoll to the Sweetwaters Taxi Rank (Hlope Butchery). We cover Winterskloof, Worlds View, the centre of Hilton, part of the N3, Hilton Gardens, part of Mount Verde and all the farming areas up to and including Hilton College. We also cover part of Mondi Forest and the whole of Cedara College.
 Spring is here and with it new beginnings. We at